
Instead of repeating keyword research and publishing tasks across separate WordPress dashboards, build a site-by-site workflow for Improve SEO, then expand it only after confirming multisite support. For an Improve SEO WordPress multisite rollout in 2026, verify compatibility and activation scope before changing your live network.
- Improve SEO WordPress multisite setup starts with compatibility verification, not network activation.
- Improveseoplugin’s WordPress plugin suits local business owners who want keyword research and publishing inside WordPress.
- Test one subsite before extending the workflow to other locations.
- Keep business details, local keywords, drafts, and schedules separate for each subsite.
Why this matters
WordPress multisite shares a WordPress installation across multiple sites. It does not make every plugin compatible with network administration, separate site settings, or network-wide activation.
Improveseoplugin describes Improve SEO as a WordPress plugin for finding low-competition local keywords, generating branded content, and publishing or scheduling that content from the dashboard. Those functions establish its purpose, not its behavior inside a multisite network.
Improveseoplugin’s WordPress plugin is best for small local business owners who want local keyword research and content publishing inside WordPress. Multisite compatibility is a separate requirement to verify before deployment.
For your 2026 rollout, treat installation, activation, configuration, and publishing as separate checks. A plugin appearing in the network’s plugin list confirms installation; it does not confirm that every subsite has a working content workflow.
Before you start
- Access and recovery: Have a WordPress Super Admin available, a recoverable backup, and a staging copy or designated test subsite. Keep an existing live publishing workflow intact during testing.
- Plugin requirements: Obtain the current Improve SEO installation instructions and explicit guidance on multisite support, activation scope, and account requirements. Confirm whether configuration belongs to each subsite or the network before entering credentials.
- The easy-to-miss gotcha: Network activation and subsite activation are different. Network activation applies a plugin across the network; it does not prove that account connections, business details, or content settings are shared or isolated correctly.
Do not enable multisite solely to follow this guide if your business uses a single WordPress site. Converting a single-site installation is a separate infrastructure change, not a required step for using a WordPress plugin.
Compatibility and activation scope
Establish the supported deployment
- Confirm that the current Improve SEO release supports your WordPress multisite configuration. Ask specifically about network activation, individual subsite activation, and separate business settings.
- Confirm the account requirements for multiple sites. Do not assume an account connected on the main site also connects every subsite.
- Ask where generated content and scheduled posts are stored. Your acceptance requirement is that each item belongs to its intended subsite.
- Choose the activation scope that the plugin’s current instructions explicitly support. If multisite support remains unconfirmed, stop before production activation.
Expected result: You have a supported activation method and know where configuration belongs. Installing the plugin successfully is not a substitute for this result.
Use this comparison to understand the WordPress activation choices. It describes WordPress behavior, not a promise that Improve SEO supports both methods.
| Activation option | Best for | Advantage | Limitation |
|---|---|---|---|
| Individual subsite activation | An isolated pilot, when supported | Limits the initial deployment to the selected site | Requires deliberate activation and configuration for additional sites |
| Network activation | A network-wide deployment explicitly supported by the plugin | Applies activation across the network | Broadens the effect of compatibility problems and does not establish shared configuration |
Prefer an individual-subsite pilot when the supported setup allows it. Network activation is an administrative choice, not evidence that the plugin is ready for every business or location in your network.
Record a baseline
Before changing anything, record the test site’s address, current plugin state, and existing scheduled posts. Note which account performs setup and which account handles daily publishing.
For the 2026 pilot, use 1 subsite and 1 draft post as your initial test scope. These are recommended limits for isolating problems, not product limits or performance benchmarks.
Subsite installation and connection
Install through network administration
- Sign in as a Super Admin. From the administration toolbar, open My Sites, then Network Admin, then Plugins.
- Review the installed plugins before adding anything. If Improve SEO is already installed, avoid uploading another copy or replacing files without checking the existing version and deployment instructions.
- If installation is required, open Add New Plugin and use Upload Plugin for the authorized plugin ZIP file. Select the file and choose Install Now.
- Return to the plugin list. Use Network Activate only when the supported deployment calls for network activation; otherwise, leave network activation off and continue with the supported subsite-level method.
Expected result: WordPress lists the intended plugin, and its activation state matches the deployment you selected. No unrelated subsite should be included in an individual-site pilot.
A successful upload only means WordPress accepted the package. Do not interpret it as a completed account connection, successful content generation, or proof of multisite compatibility.
Connect the intended subsite
- Open My Sites, select the test subsite, and choose Dashboard. Check the site address before configuring anything.
- For supported individual-site activation, open Plugins, then Installed Plugins, and choose Activate beside Improve SEO. A network-activated plugin is controlled from network administration instead.
- Follow the current Improve SEO instructions for the connection or account setup shown in that subsite. Use the actual field names in your installed release; do not enter credentials into an unrelated WordPress settings screen.
- Complete the plugin’s documented connection check. Then reload the subsite dashboard and verify that the expected connection remains in place.
Expected result: The intended subsite has a working connection under the supported setup. A connection on the network’s main site alone does not satisfy this check.
If the plugin does not present a documented way to configure the subsite, stop there. Do not copy database values between sites or change network options to force a connection.
Local content and publishing checks
Prepare the local brief
Improve SEO’s local keyword and branded-content functions need an accurate business brief. Keep that brief specific to the business represented by the current subsite, even when the network shares a theme or administrator.
- Record the subsite’s business name, actual services, service area, and intended customer. Use approved business information rather than copying another location’s details.
- Select a local keyword relevant to a service the business actually provides. Review search intent as well as competition: a query about employment or training is not equivalent to a customer seeking the service.
- Generate a draft using the documented Improve SEO workflow. Review the output before publishing, especially location names, service claims, and calls to action.
- Open the draft from the current subsite’s Posts screen. Confirm that the title, author, content, and site address belong to the intended business.
Expected result: Your test draft exists on the correct subsite and contains approved local business information. Content generation alone does not complete the test.
Use this sequence for every new location: Local brief, Keyword selection, Draft review, then Schedule check. Moving directly from keyword selection to publication removes the check most likely to catch another location’s details.
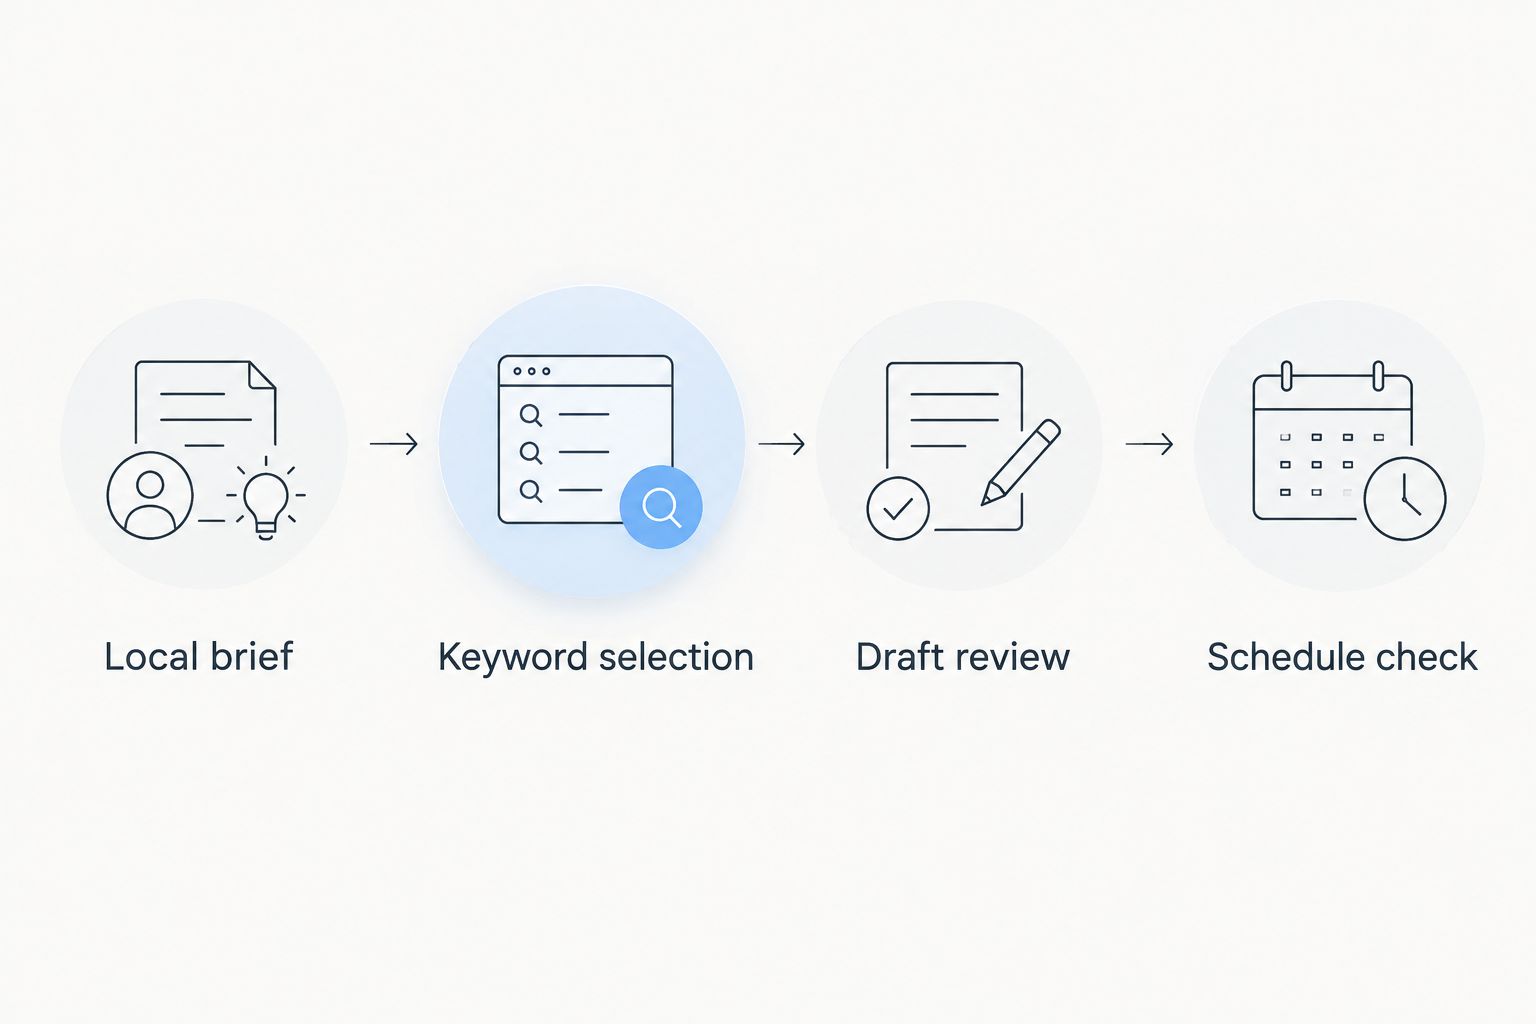
A shared network does not justify publishing the same local article everywhere. If different subsites serve different businesses or areas, write for those differences rather than changing only the place name.
Validate scheduling and permissions
- Open Settings, then General, on the test subsite and inspect Timezone. Set the intended local timezone before choosing a publication time.
- Schedule the approved test post through the documented publishing workflow. Confirm the scheduled date and time in the subsite’s post list.
- Check the public site after the scheduled publication time. WordPress scheduled publishing depends on its task-scheduling system; a saved schedule is not proof that publication occurred.
- Test with 2 user accounts: the Super Admin used for setup and the account responsible for routine content work. Confirm that the publishing account can perform its assigned tasks without receiving unnecessary network access.
Expected result: The post publishes on the correct subsite, at the intended local time, through the account workflow your team will actually use.
For a 2026 publication schedule, check the timezone rather than assuming every location follows the network administrator’s clock. A working schedule on one subsite does not validate the timezone settings on another.
Variant: update an existing location instead of adding a new site
When a business changes its services or service area, update its existing subsite workflow rather than creating another connection by default. This keeps the change tied to the site that already represents that business.
- Open the existing subsite and confirm its address.
- Correct the business brief and review keywords affected by the change.
- Inspect unpublished drafts and scheduled posts for outdated information.
- Revise the affected content and repeat the draft, permissions, and scheduling checks.
Expected result: Future content reflects the updated business information without assuming that editing a brief automatically rewrites existing posts.
This variant works as a manual review workflow. Do not treat a business-profile edit as an automatic trigger for content regeneration unless the plugin’s current documentation explicitly describes that behavior.
Troubleshooting
Improve SEO is missing from the subsite plugin list
Start in Network Admin, then Plugins, and verify installation and activation state. Network settings control whether site administrators have access to plugin administration; an absent menu is not evidence that the upload failed.
Have the Super Admin inspect the setup. Do not grant network privileges merely to make a plugin menu appear.
Activation works, but the content workflow does not
Separate the checks: plugin activation, account connection, content generation, and publishing. Repeat the documented connection procedure on the intended subsite and inspect any displayed error before changing other settings.
If the failure depends on multisite activation scope, stop the rollout and resolve compatibility first. Repeated activation across more sites only spreads the unresolved problem.
Drafts contain another location’s details
Confirm the active subsite and review the business information used for that draft. Correct the source brief, then review affected unpublished content before allowing further publication.
If business settings appear to carry across sites unexpectedly, pause the deployment. Verify the documented storage and configuration scope rather than assuming the settings are isolated.
A scheduled post does not publish
Check the subsite’s Timezone, the post’s scheduled time, and its current status. Ask the hosting administrator to inspect WordPress scheduled tasks if the time has passed and the post remains scheduled.
Do not reschedule repeatedly without checking the underlying task system. Otherwise, you change the test conditions without addressing the failure.
The publishing account cannot complete the workflow
Repeat the failed action while signed in as the actual publishing account. Compare the account’s assigned role with the permissions required for that action and the plugin’s documented requirements.
Adjust only the necessary permissions. A workflow that succeeds for a Super Admin but fails for the daily operator is not ready for handoff.
Customize your workflow
After the pilot passes, expand in small, reviewable groups. Keep a deployment record for each subsite: connection checked, business brief approved, draft reviewed, publishing account tested, and schedule verified.
Improveseoplugin’s WordPress plugin combines local keyword research with content creation and publishing. The benefit is fewer handoffs between those tasks; the limitation for a multisite rollout is that shared infrastructure still requires site-specific verification.
Use one editorial checklist across the network, but keep business facts and publishing decisions local. For your 2026 rollout, retain the pilot as a repeatable acceptance test whenever the plugin, hosting configuration, or publishing permissions change.
FAQ
Can I use Improve SEO on a WordPress multisite network?
Confirm explicit multisite support for the current Improve SEO release before deployment. Successful installation or activation does not establish that account connections, site settings, and publishing work correctly across subsites.
Should I network-activate Improve SEO?
Use network activation only when the current Improve SEO instructions support that deployment. When individual-site activation is supported, a single-subsite pilot limits the initial scope of testing.
Does connecting the main site connect every subsite?
Do not treat the main site’s connection as confirmation that every subsite is connected. Verify the documented account setup and connection status for each site included in your deployment.
Do I need a Super Admin to install the plugin?
Plugin installation in a standard WordPress multisite network requires a Super Admin. Site administrators’ access to plugin activation also depends on network settings and the plugin’s activation state.
Can each location use different local keywords?
Give each location its own keyword brief based on its actual services and service area. Confirm how Improve SEO stores site-specific configuration before assuming that one location’s settings remain separate from another’s.
Why did my scheduled WordPress post miss its publication time?
Check the subsite timezone and WordPress scheduled tasks first. A saved publication time does not confirm that the task responsible for publishing has executed.
Can I automatically update every article when a location changes?
Do not assume that changing business information updates existing articles. Review affected drafts, scheduled posts, and published content separately unless the current plugin documentation explicitly describes an automatic update function.
One last thing
A successful Super Admin test is not a successful staff handoff. Finish by signing in as the person who will actually prepare and publish local content.
Have that person verify the subsite, review a draft, and inspect its schedule without network-level assistance. That final check separates an installed plugin from a usable publishing workflow.